

Key Takeaway: Starting your CNC machining journey doesn’t require expensive equipment or advanced engineering degrees. With a desktop CNC router and these 10 progressive projects, you can go from cutting your first nameplate to machining complex 3D contoured parts — building real skills one project at a time.
Table of Contents
1. Why Start with Progressive CNC Projects
Reading about CNC machining teaches theory; making actual parts develops competence. The right CNC projects for beginners teach fundamental skills progressively — each build adds new capabilities that prepare you for more complex work. The approach outlined here is designed to take you from zero experience to confident CNC operator through ten carefully planned builds.
A common mistake is jumping straight to ambitious projects like aluminum engine parts or precision gears. These require mastery of feeds, speeds, workholding, and toolpath strategies that beginners simply haven’t developed yet. Starting too advanced leads to broken tools, ruined material, and frustration.
Instead, the progressive project approach ensures each project reinforces the skills you learned in the previous one while introducing exactly one new concept. You build competence systematically rather than hoping for a lucky break.
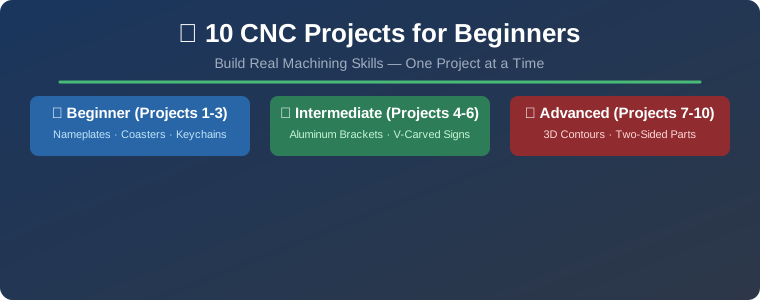
2. Beginner CNC Projects for Beginners (1-3)
Project 1: Custom Keychain or Nameplate
Start with a simple engraved sign or personalized nameplate. This teaches the complete CAD-to-CAM-to-CNC workflow without overwhelming complexity. Design text and simple graphics in CAD software, use a 60° or 90° V-bit for engraving, and profile cut the perimeter with a 1/8” or 1/4” end mill.
Key Skills: Importing SVG/DXF into CAM, setting toolpaths for engraving (1-2mm depth), workholding with clamps or tape, verifying toolpaths visually before cutting.
Project 2: Wooden Coasters
Create a set of wooden coasters with decorative pockets. This project introduces pocketing operations — removing material from enclosed areas. Machine the top surface first, cut pockets for decorative elements (typically 10-15mm wide, 5mm deep), then profile cut the perimeter leaving small tabs to hold the part during machining.
Key Skills: Pocketing toolpaths with 40-60% stepover, multiple Z-depth operations, creating and removing tabs, applying food-safe finish.
Project 3: Electronics Enclosure or Box
Machine a simple enclosure with multiple components that fit together — base with mounting holes and internal cavity, plus a corresponding lid. This introduces designing for press-fit (0.1-0.2mm interference) or screw assembly.
Key Skills: Designing for machining constraints, creating precise fits, workholding small parts safely, maintaining consistent tool diameter compensation.
3. Intermediate Projects (4-6)
Project 4: Aluminum Bracket
Your first metal project. Create a functional bracket or mounting plate with holes and slots. Start with conservative parameters: 10,000-15,000 RPM spindle speed, 200-400mm/min feed rate, 0.5-1mm depth per pass. Use lubricant or compressed air to prevent chip welding.
Project 5: V-Carved Decorative Sign
V-carving creates variable-width lines based on depth — deeper cuts produce wider lines. This enables elegant typography without 3D modeling. Design text in vector software, import to CAM with V-carve toolpath.
Project 6: Custom Jig or Fixture
Build a practical workholding fixture for your shop. This connects your CNC capability to actual workflow needs — solving a real problem like holding parts for consistent drilling or aligning components for assembly.
4. Advanced Projects (7-10)
Once you’re comfortable with the basics, tackle 3D contoured parts requiring ball end mills, two-sided machining with precise alignment, inlay work, and complete mechanical assemblies with multiple interlocking components.
5. Progressive Skill Building Strategy
Complete the first three projects before attempting metal or complex work. Master basic CAD/CAM workflow, 2D toolpaths, V-bit engraving, workholding techniques, and basic feeds and speeds for wood before moving to intermediate projects that introduce aluminum cutting and V-carving.
6. Material Selection Guide
Start with soft woods like pine or poplar, then move to hardwoods, acrylic, and finally aluminum. Each material teaches different aspects of the machining process, from chip evacuation to heat management.
Frequently Asked Questions
What is the best CNC machine for beginners?
A desktop CNC router like the CNC 3018 (₹5,000-15,000 in India) or a Shapeoko-style machine offers the best entry point. These are affordable, have a large community for support, and can handle all beginner through intermediate projects.
What software do I need for CNC projects?
For CAD design, start with Fusion 360 (free for hobbyists) or FreeCAD (completely free and open-source). For CAM toolpaths, Fusion 360 includes built-in CAM. For controlling the machine, use Candle or Universal G-code Sender (UGS) — both are free.
How long does it take to learn CNC machining?
Most beginners can understand basic toolpaths and machine operation within a few weeks of consistent practice. Complete the first 3 projects to build confidence, then intermediate projects 4-6 expand your capabilities significantly over 2-3 months.
What materials should beginners start with?
Start with forgiving materials like soft woods (pine, poplar), MDF, or certain plastics (acrylic, HDPE). Once comfortable with setup and toolpaths, move to harder woods and eventually softer metals like aluminum.
Related Reading
- GRBL CNC Setup Guide: From Arduino to First Project
- FreeCAD vs Fusion 360 vs SolidWorks: CAD Software for CNC
Sources
- DesktopCNCForge — 10 CNC Projects for Beginners
- Makera — How to Use a CNC Machine for Beginners
- Makera — 10 Easy CNC Projects for Beginners
- American Rotary — 10 Easy CNC Milling Projects for Beginners
Disclosure: This post may contain affiliate links. As an Amazon Associate, we earn from qualifying purchases.


